You cracked open an egg for breakfast and found it floating in water instead of sinking to the bottom. Or perhaps you noticed your breakfast eggs cracking in the carton before you even got to the kitchen. These aren't just annoying moments—they're warning signs that your flock's eggshell integrity is compromised, and that costs you real money in lost inventory and reduced market value.
Eggshell quality affects everything from consumer preference to your feed conversion efficiency. When shells fail, you lose product before it reaches the market, and stressed shells often indicate stressed hens. Understanding the difference between a normal eggshell and a defective one isn't just about grading eggs for sale—it's about diagnosing broader flock health issues before they impact your entire production cycle.
Understanding the Architecture of a Strong Shell
Before diagnosing defects, you need to understand what a proper eggshell looks like structurally. An eggshell isn't just calcium carbonate; it's a sophisticated composite material with three distinct layers that determine its strength and quality.
The innermost layer consists of the mammillary layer—those cone-shaped structures that anchor the shell to the shell membrane. Above this sits the palisade layer, the thickest section composed of vertical crystal columns packed tightly together. Finally, the outermost cuticle acts as a protective coating. When this architecture functions properly, the shell can withstand significant pressure. However, research shows that eggshell quality declines as hens extend their laying cycles, meaning older flocks naturally produce thinner shells regardless of management practices.
This structural knowledge matters because different defects attack different layers. Soft shells often indicate failures in the mammillary layer formation, while cracked shells suggest problems with the palisade layer's integrity. By understanding which layer is compromised, you can narrow down whether you're dealing with a nutritional deficiency, a disease challenge, or a management error.
Spotting the Defects: Your Diagnostic Checklist
Thin and Soft Shells
Thin shells appear translucent when held to the light, and you can often feel the membrane texture without the hard outer shell. Soft shells feel leathery or rubbery and crack easily under pressure. These defects typically stem from inadequate calcium deposition during shell formation.
In your flock, thin shells often appear suddenly when you switch feeds or during peak production cycles. Young layers just coming into production sometimes produce thin shells until their reproductive systems fully mature. If you notice thin shells appearing across multiple hens simultaneously, suspect a nutritional problem rather than individual bird issues.
Broken and Cracked Shells
While broken shells are obvious, hairline cracks—often called "checking"—are harder to spot. You can test for these by gently pressing the egg between your palms; a defective shell will crack under minimal pressure. Broken shells indicate structural weakness in the palisade layer, often caused by sudden impacts, calcium shortages, or stress-induced shell gland dysfunction.
Speckled, Translucent, and Pimpled Shells
Speckled shells show dark spots scattered across the surface, while translucent shells allow light to pass through unevenly. Pimpled shells have raised bumps or craters on the surface. These cosmetic issues usually result from irregular calcium deposition or irritation to the shell gland during the egg's formation.
The Calcium Splash Problem
One distinctive defect involves thick, irregular calcium deposits on the shell surface—often appearing as white splashes or pink discoloration. This occurs when eggs remain in the shell gland too long, allowing excessive calcium to deposit. Young flocks are particularly susceptible to this issue because their reproductive systems sometimes fail to release the egg at the proper time, leaving it in the shell gland for extended periods.
Why Shells Go Wrong: Root Cause Analysis
Nutritional Gaps
Calcium deficiency represents the most common nutritional cause of shell problems. Layers require approximately 4 grams of calcium daily, with a calcium-to-phosphorus ratio of 2:1 or 3:1 in the diet. When calcium falls below 3% of the feed, or when vitamin D3 is insufficient, the shell gland cannot deposit adequate calcium carbonate.
However, excess protein can also cause problems. When protein levels exceed energy levels in the diet, the metabolic cost of converting protein to energy diverts resources from shell formation. Similarly, fat supplementation requires careful balancing; while fats provide essential fatty acids that support hormone production, suboptimal fat levels or improper fatty acid ratios can reduce eggshell thickness and strength.
Energy deficiencies create particularly insidious problems because they often manifest as thin shells without other obvious symptoms. When your birds don't consume enough metabolizable energy, the shell gland receives insufficient resources to complete calcification, resulting in weak shells that break during collection or transport.
Environmental Stress
Temperature extremes directly impact shell quality. When ambient temperatures rise above 30°C, hens reduce feed intake to minimize metabolic heat production. This reduced intake often means insufficient calcium and vitamin D3 consumption, leading to thin shells. Conversely, cold stress increases feed consumption but may alter calcium metabolism.
Moisture stress affects shell quality through dehydration. When birds don't have adequate water intake, they cannot transport calcium to the shell gland efficiently. In Kenyan climates, this becomes particularly relevant during dry seasons when water availability fluctuates.
Stress from overcrowding, predator threats, or sudden environmental changes causes corticosterone release, which interferes with the shell gland's ability to deposit calcium properly. Even if nutrition remains adequate, chronic stress can produce thin shells and shell gland dysfunction.
Breed and Genetic Factors
Certain breeds inherently produce thinner shells than others. Commercial high-production layers often prioritize egg number over shell thickness, making them more susceptible to shell defects when nutrition or management isn't perfect. Heritage breeds or dual-purpose breeds may offer more robust shells but typically at lower production rates.
Age represents a genetic clock on shell quality. As hens approach 60-70 weeks of age, shell thickness naturally decreases regardless of management quality. This biological reality means you must adjust your nutritional strategies as your flock ages, typically increasing calcium levels by 0.5-1% in the second year of production.
Disease and Parasite Pressure
Infectious bronchitis virus, Newcastle disease, and infectious Coryza can all damage the shell gland, leading to permanent shell quality problems even after recovery. Mycoplasma synoviae causes subtle but persistent shell quality issues that often go unnoticed until economic losses appear.
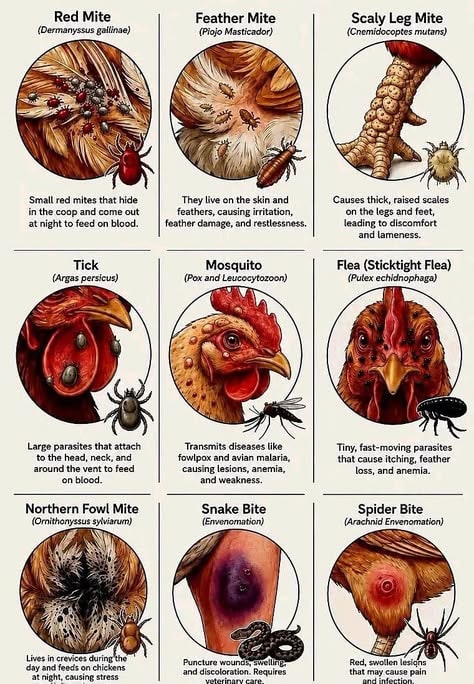
Parasites like Ascaridia galli and Heterakis can cause intestinal damage, reducing nutrient absorption efficiency. When your birds suffer from coccidiosis or endoparasites, they cannot absorb calcium and vitamin D3 effectively, exacerbating any nutritional shortfalls in the feed.
Diagnosing Your Specific Problem
Before changing your feed or management practices, conduct a systematic diagnosis. Start with visual inspection of the flock. Are thin shells appearing in specific age groups or affecting all hens equally? Uneven distribution suggests management or nutritional issues, while age-specific problems point to genetic or reproductive system failures.
Perform the water float test on suspect eggs. Fresh eggs sink in water; eggs with thin shells float or stand upright. This simple test reveals shell integrity without specialized equipment.
Check your calcium carbonate source. If using oyster shell or limestone, ensure particle size is appropriate—particles too large cannot be utilized effectively by the shell gland. Most nutritionists recommend 60-70% of calcium carbonate particles between 2-4mm diameter.
Review your lighting program. Insufficient light stimulation reduces feed intake and reproductive hormone production, directly impacting shell gland function. Ensure your photoperiod meets the requirements for your specific breed and production stage.
Fixing It: Prevention and Remediation Strategies
Feed Adjustments
Increase dietary calcium to 3.5-4% for high-producing hens, using a combination of fine and coarse particles to ensure both immediate and sustained calcium release. Maintain phosphorus at 0.3-0.4% and provide 2000-3000 IU of vitamin D3 per kilogram of feed.
If using fat supplementation, balance omega-6 and omega-3 fatty acids carefully. Excess linoleic acid without adequate antioxidants can cause oxidative stress, damaging the shell gland. Consider adding 1-2% vegetable oil with appropriate antioxidant protection.
Avoid sudden feed changes. When transitioning between layer feeds or adding supplements, introduce changes gradually over 7-10 days to prevent digestive upset that affects nutrient absorption.
Environmental Management
Maintain house temperatures between 18-24°C for optimal shell formation. Install evaporative cooling or ventilation systems that ensure air movement without creating drafts. Provide 2-3 liters of water per bird daily, ensuring clean, accessible water points.
Reduce stress through consistent routines. Use the same collection times daily, maintain predictable feeding schedules, and minimize handling during the critical shell formation period (typically 10am-4pm when eggs are in the shell gland).
Flock Management
For young flocks showing shell quality issues, increase calcium levels slightly and ensure adequate protein (16-18%) until shells normalize. For older flocks, consider increasing calcium to 4% and adding 0.1% additional vitamin D3 to compensate for reduced intestinal absorption efficiency.
Implement regular shell quality monitoring. Grade 100 eggs weekly, recording the percentage of defects. If defects exceed 5%, investigate nutritional or management factors immediately rather than waiting for economic losses to accumulate.
The Bottom Line: When to Worry
Shell defects cost more than the immediate lost product. Broken eggs contaminate cartons, reducing market value for entire batches. Thin shells lead to higher breakage during collection and transport. Soft shells indicate potential shell gland infections that may spread through the flock.
Monitor your economic threshold. If shell defects cost you more than 5-10% of expected revenue, implement immediate changes. For small-scale farmers, this might mean adjusting feed rations; for commercial operations, it may require veterinary consultation to rule out infectious disease.
Remember that occasional shell defects happen—don't panic over single eggs. However, consistent patterns across multiple hens or sustained periods of poor shell quality demand immediate attention. Your flock's shell quality reflects their overall health status, and addressing these issues early prevents larger economic impacts down the production cycle.
Have you noticed specific shell defects in your flock? Share your experiences in the comments below, and let us know which management changes helped you improve eggshell integrity. If you're facing persistent shell quality issues that don't respond to nutritional adjustments, consider reaching out to a poultry veterinarian for flock health evaluation.