Every year, farmers lose chicks in the first week — not to disease, not to predators, but to a brooder that wasn't ready. The chicks arrive cold, the heat lamp wasn't tested, the water is an afterthought, and by day three you're counting losses that were completely preventable. Brooding is the single most important stage in raising meat chickens, because mistakes made in the first seven days show up later as poor growth, uneven weights, and a feed conversion ratio that eats your profit.
The good news? A proper brooder setup is not complicated or expensive. It just requires doing the right things in the right order — and doing them before the chicks arrive, not after.
This guide walks you through the full setup: space, heat, bedding, feeders, waterers, temperature schedules, and a simple apple cider vinegar (ACV) routine many farmers use to support gut health in young birds.
Why Brooding Matters More for Meat Chickens
Broilers are not like layers or indigenous birds. Modern meat chicken breeds grow at an astonishing rate — often reaching slaughter weight in five to seven weeks. That speed is their strength, but it's also their weakness.
A day-old broiler chick cannot regulate its own body temperature for the first two weeks of life. If it gets chilled, it stops eating, its immune system weakens, and its growth is permanently set back. A chick that falls behind in week one rarely catches up, and in a flock of meat birds, that means uneven sizes at market and money left on the table.
So when you set up a brooder, you're not just keeping chicks warm. You're setting the growth trajectory for the entire production cycle.
The Golden Rule: Be Ready 24 Hours Early
The most important rule of brooder setup is this: have everything running and at temperature for at least 24 hours before your chicks arrive. This is not optional.
Why does this matter so much?
- Heat lamps and charcoal jikos take time to stabilize at a consistent temperature.
- Bedding straight from the store can be cold and slightly damp; pre-heating dries and warms it.
- You need time to discover problems — a faulty bulb, a drafty corner, a thermometer that doesn't work.
Imagine your chicks arriving at 10 a.m. from the hatchery, and you only then start lighting the jiko or hanging the lamp. Those chicks will spend their first critical hours huddled and stressed. Chilled chicks often develop pasty vents (droppings stuck to the vent), which can kill them if not managed.
Set up, switch on, and monitor for a full day. If the temperature holds steady through the night, you're ready.
Step 1: Choose and Prepare the Brooder Space
A brooder is simply a warm, dry, draft-free, safe enclosure where chicks live for their first two to four weeks. It can be:
- a dedicated room in your poultry house
- a large cardboard box or wooden pen for small numbers
- a sectioned-off corner of an existing chicken house
- a commercial brooder unit
Whatever you use, it must meet five conditions:
- Draft-free at chick level. Cold air moving across the floor chills chicks even when the air above feels warm. Check for gaps near the floor.
- Dry. Damp bedding breeds disease and cools chicks. Fix roof leaks before chick day, not after.
- Easy to clean. Smooth surfaces you can scrub and disinfect.
- Predator-proof. Rats are a serious threat to day-old chicks, especially at night. Seal holes and elevate where necessary.
- Away from older birds. Never brood chicks in direct contact with adult chickens — disease risk is too high.
For Kenyan farmers working with limited space, a simple wooden box of about 1m x 2m with 45cm-high sides works well for 50 chicks in the first two weeks. Urban farmers in Nairobi and other towns often brood successfully in a spare room or a well-ventilated store, as long as heat and hygiene are managed.
How Much Space Do Chicks Need?
Crowding causes piling (chicks smothering each other), uneven growth, and wet litter. As a general guide:
- Week 1–2: about 0.05 square metres per chick (roughly 20 chicks per square metre)
- Week 3–4: about 0.1 square metres per chick
- After brooding, broilers need expanding space as they grow toward slaughter weight
A useful trick is the brooder guard — a circular barrier of cardboard or metal sheeting about 45cm high, placed around the heat source. It keeps chicks near the warmth for the first days and prevents them from crowding into cold corners. The guard can be removed after about a week as you open up more space.
Step 2: Install and Test Your Heat Source
Heat is the heart of the brooder. Common options include:
- Infrared heat lamps (250W red bulbs): cheap, widely available, easy to adjust by raising or lowering. The red light reduces pecking behaviour.
- Charcoal jikos or stoves: common where electricity is unreliable, but require constant attention, ventilation (carbon monoxide kills chicks silently), and fire safety.
- Ceramic heat emitters: produce heat without light, useful where 24-hour light disrupts chick rest.
- Gas or electric brooders: efficient for larger commercial numbers.
Whichever source you use, follow these principles:
- Hang lamps so the height is adjustable — raising the lamp is how you reduce temperature week by week.
- Have a backup. Bulbs blow, power goes out, charcoal burns down. A spare bulb and a backup heat plan can save an entire batch.
- Create a temperature gradient. Chicks should be able to move toward the heat or away from it. Heat the whole space, but let one side be slightly cooler so birds self-regulate.
A brooder is doing its job when chicks can eat, drink, rest, move toward warmth, move away from it, and stay dry without competing for space.
Step 3: Get the Temperature Right
Temperature management is where most brooding succeeds or fails. The standard schedule for meat chickens:
| Age of chicks | Temperature at chick level |
|---|---|
| Day 1–7 | 33–35°C |
| Week 2 | 29–32°C |
| Week 3 | 26–29°C |
| Week 4 | 21–26°C |
| Week 5 onward | Around 18–21°C, or ambient if warm enough |
Measure temperature at chick level — about 5cm above the bedding — not at your waist height. Hang a reliable thermometer where the chicks actually live.
Reduce the temperature by roughly 2–3°C per week. You can stop supplemental heat once the brooder temperature matches the outside temperature, or when the birds are fully feathered — usually around 3–5 weeks depending on your climate. In warmer parts of Kenya, heat may only be needed at night after week two or three; in cooler highland areas, you'll need it longer.
Read the Chicks, Not Just the Thermometer
Thermometers can lie. Chicks never do. Their behaviour tells you exactly what the temperature is doing:
- Huddled tightly under the heat source, cheeping loudly: too cold. Lower the lamp or add heat.
- Pressed against the far edges, panting, wings drooping: too hot. Raise the lamp or reduce heat.
- Huddled on one side only: draft. Find and block it.
- Evenly spread out, some eating, some drinking, some sleeping, quiet soft chirping: perfect.
Check on them several times a day and at least once late at night — nights are when temperatures crash and chicks die. Are you checking your brooder after midnight during week one? If not, that's the first habit to build.
Step 4: Bedding Done Right
Bedding (litter) keeps chicks warm from below, absorbs moisture, and gives them grip. Slippery floors cause splayed legs in day-old chicks — a permanent deformity.
Good options:
- Wood shavings: the most popular choice. Use 5–8cm depth. Avoid fine sawdust in week one — chicks may eat it and it can impact their crop.
- Chopped straw: workable but less absorbent.
- Rice husks: available in some areas; ensure they're dry and clean.
Avoid:
- Newspaper alone (too slippery — only acceptable for the first day or two under feed, then remove)
- Wet or mouldy material of any kind
- Cedar shavings (aromatic oils can irritate chicks)
For the first two or three days, many farmers scatter feed on paper or trays over the litter so chicks learn to eat before they learn what bedding is. Remove the paper once all chicks are feeding from feeders.
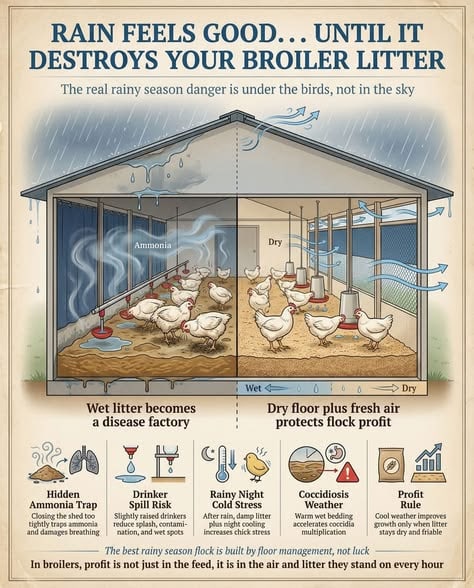
Turn the litter daily and remove wet spots, especially around waterers. Wet litter is the single biggest driver of ammonia build-up, coccidiosis, and respiratory problems in brooders.
Step 5: Feeders and Waterers
Feeders
Chicks should never have to walk more than about a metre to find feed in the first days.
- Start with shallow trays, egg flats, or chick feeder lids for the first 2–3 days.
- Transition to hanging tube feeders or long troughs by the end of week one.
- Provide roughly 2–3cm of feeder space per chick in the early weeks — enough that all birds can eat at once.
- Raise feeder height as birds grow so the lip sits at the height of the birds' backs. This cuts feed wastage dramatically.
Feed a quality broiler starter crumble from day one. Don't dilute it with maize bran or kitchen scraps during brooding — the starter is formulated for exactly this growth stage, and shortcuts here cost you kilograms at slaughter.
Waterers
Water is even more critical than feed in the first hours. A chick can survive a day without feed; dehydration kills fast.
- Use chick-sized waterers with shallow lips so chicks can't drown or get soaked.
- Provide at least two waterers per 50 chicks, placed near but not under the heat source.
- Wash and refill daily — chick waterers foul quickly with litter and feed.
- Check the floor under each waterer every time you pass. Wet litter under a waterer means a leak or a design problem.
On arrival day, dip each chick's beak gently into the water as you place it in the brooder. This teaches it where water is and starts hydration immediately after the stress of transport.
The ACV Question: Apple Cider Vinegar in Chick Water
Many poultry farmers add raw, unpasteurized apple cider vinegar (ACV) to chick drinking water, and it's worth understanding what it can and can't do.
What farmers commonly report and use it for:
- Supporting gut health and digestion in young birds
- Helping maintain a slightly acidic gut environment, which may discourage some harmful bacteria
- Encouraging water intake in some flocks
A commonly used rate among poultry keepers is roughly 5ml (one teaspoon) of raw ACV per litre of drinking water, offered a few days per week rather than continuously. Always use raw, unfiltered ACV, use plastic waterers (vinegar corrodes galvanized metal), and keep the water fresh daily.
Now the honest part: ACV is a supportive practice, not a medicine. It does not replace vaccination, clean water, quality feed, or veterinary care. If your chicks show signs of illness — droopiness, diarrhoea, huddling, off feed — consult a qualified veterinarian rather than reaching for home remedies. Think of ACV as one small tool in a much bigger hygiene and management toolbox.
Light, Ventilation, and Daily Routine
Light
For the first 48 hours, provide near-continuous light so chicks can find feed and water. After that, a period of darkness (even just an hour or two initially) helps them learn to rest and prevents panic if power fails later. If you're using heat lamps, plan light and heat together — a ceramic emitter plus a separate low-wattage bulb gives you independent control.
Ventilation
Warm and stuffy is not the goal; warm and fresh is. Ammonia from droppings builds up fast in a small sealed brooder and damages chicks' respiratory systems. Provide ventilation above chick level while blocking drafts at floor level. If your eyes sting when you lean into the brooder, ammonia is already too high.
A Simple Daily Brooder Checklist
Do this at least three times a day for the first two weeks:
- Check chick behaviour (spread, huddling, panting).
- Check the thermometer at chick level.
- Refill and clean waterers; check for leaks.
- Check feed levels and feeder height.
- Remove wet litter spots; turn dry litter.
- Remove any dead chicks immediately and record mortality.
- Confirm the heat source and backup are working.
Keeping a simple record — date, temperature, mortality, feed used — takes two minutes and tells you more about your operation than any guesswork ever will.
Common Brooder Mistakes That Cost Farmers Money
Avoid these and you're ahead of most beginners:
- Setting up on delivery day. The 24-hour pre-heating rule exists because of this mistake.
- Trusting the thermometer alone. Chick behaviour is the real gauge.
- Overcrowding. It feels efficient; it produces runts, piling deaths, and wet litter.
- Letting litter get wet. Especially under waterers. Wet litter is a disease factory.
- No backup heat plan. One blown bulb on a cold night can wipe out a batch.
- Ignoring the brooder at night. Most chilling happens between midnight and dawn.
- Diluting starter feed. False economy that delays slaughter age and raises total feed cost.
The Bottom Line
A good brooder comes down to five things: warmth you can control, dryness you maintain, feed and water within easy reach, space that grows with the birds, and a farmer who observes the chicks more than the equipment. Get the first two weeks right, and your meat chickens will reward you with the fast, even growth these breeds are capable of. Get it wrong, and no amount of good feed later will fully recover the lost start.
Before your next batch arrives, walk through the checklist above and ask yourself honestly: if the chicks came today, would my brooder pass?
If you found this guide useful, follow Poultry Market for more practical, no-nonsense poultry farming content. Have a brooder tip that has worked on your farm — or a mistake you learned from the hard way? Share it in the comments so other farmers can learn from you, and pass this article along to anyone preparing for their first batch of broiler chicks.