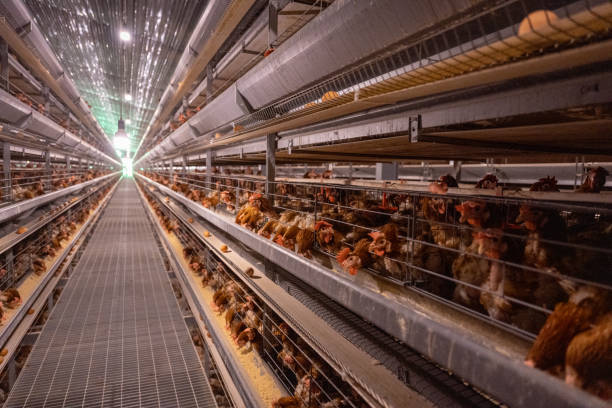
Chickens produce a lot of manure – about 0.1 kg per bird per day. In a poorly maintained coop, this manure quickly builds up and releases ammonia gas, which damages the birds' respiratory tracts and makes them more susceptible to infections like Newcastle Disease, Infectious Bronchitis, and Chronic Respiratory Disease (CRD).
Dirty, wet litter is also the ideal breeding ground for coccidia (the parasite that causes coccidiosis), bacteria (such as E. coli and Salmonella), and fungi (like Aspergillus). These pathogens can cause devastating outbreaks, especially in young chicks and stressed birds.
A clean coop means:
Healthier birds with stronger immune systems
Better egg production (hens under stress stop laying)
Fewer medical treatments and lower costs
Fewer external parasites (mites, lice)
Higher-quality eggs (clean shells, no faecal contamination)
Better working conditions for you (less dust, less smell)
2. Essential Coop Cleaning Tools
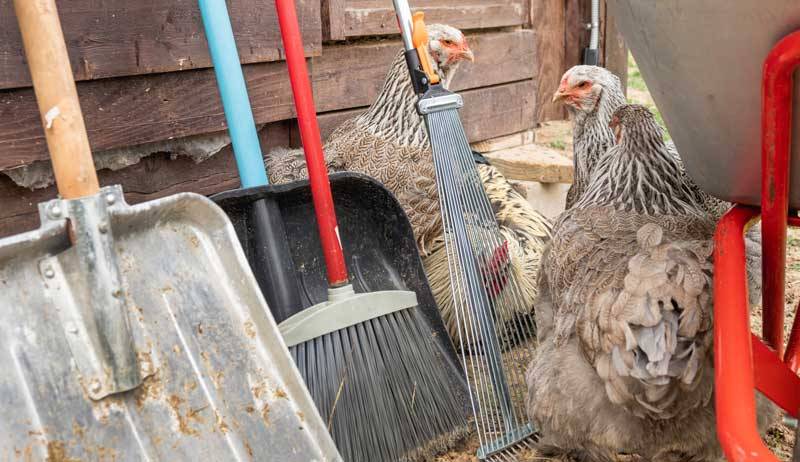
Having the right tools makes cleaning faster and more effective. You can improvise some, but invest in basics where possible.
Tool
Purpose
Kenyan alternative
Pitchfork or garden fork
Remove soiled bedding
Strong forked stick or jembe (hand hoe)
Wheelbarrow or large sacks
Haul away old litter
Plastic basin, cart, or woven bags
Broom and dustpan
Sweep dust and cobwebs
Traditional brush (kisikio)
Trowel or small shovel | Scoop nesting box material | Small hand tool or cut plastic bottle |
| Scraper (metal or plastic) | Scrape dried manure off floors/perches | Flat piece of metal or cut tin can |
| Bottle brush | Scrub waterers and feeders | Long stick with cloth tied at the end |
| Bucket | Hot soapy water | Any clean container |
| Face mask (N95 or surgical) | Protect lungs from dust | Cotton cloth folded (less effective but better than nothing) |
| Rubber gloves | Protect hands from bacteria and parasites | Reusable dish gloves or disposable ones |
| Dish soap or detergent | Clean feeders and waterers | Bar soap grated into water (use sparingly) |
| Disinfectant (optional) | Deep sanitisation | Agricultural lime (hydrated lime) or wood ash |
Kenya tip: Agricultural lime is cheap (KES 100–200 per 10 kg bag) and widely available at agrovets. It absorbs moisture, neutralises odours, and kills parasites when used under fresh bedding.
3. How Often Should You Clean?
Consistency beats intensity. A little cleaning every day saves hours of hard work later.
Task
Frequency
Time needed
Check waterers and refill with clean water
Twice daily
2–3 minutes
Remove spilled feed, scraps, and broken eggs from run
Daily
3–5 minutes
Collect eggs
Twice daily
2–5 minutes
Spot-clean wet or heavily soiled bedding areas
As needed (daily if rainy)
2 minutes
Remove all bedding from coop floor and nest boxes
Weekly
15–30 minutes (small flock)
Sweep out dust and cobwebs
Weekly
5–10 minutes
Scrape perches and floor
Weekly
5–10 minutes
Wash waterers and feeders thoroughly
Weekly
10–15 minutes
Deep clean whole coop (walls, perches, disinfect)
Monthly
1–2 hours
Treat for external parasites
Monthly (or as needed)
Varies
Rainy season adjustment: Bedding stays wet longer. You may need to clean twice weekly, or at least remove the top wet layer every 3–4 days.
Dry season adjustment: Dust levels increase. Wear your mask and consider lightly spraying water on pathways to reduce dust before sweeping.
4. Choosing the Best Bedding for Kenyan Coops
Bedding affects your chickens' health, your cleaning effort, and your wallet. Here are the most common options in Kenya, rated.
Bedding type
Pros
Cons
Availability
Cost (KES)
Straw (wheat/barley)
Easy to fork out, good insulation, chickens love foraging in it, low crop impaction risk
Can be dusty, may need changing more often if not dry
Farming areas with cereal crops
50–150 per bale
Rice hulls
Cheap where rice is grown, decent absorbency, composts well
Dusty, can harbour fungi if damp
Mwea, Kisumu, Kwale
30–80 per bag
Wood shavings
Soft, comfortable, good absorbency
Can be expensive, fine dust irritates lungs, harder to fork out
Sawmills (Eldoret, Nakuru, Thika)
100–300 per bale
Dried maize stalks (corn stover)
Free or very cheap, readily available
Breaks down quickly, needs frequent replacement, can be prickly
Almost everywhere
Free–50 per bundle
Sand
Drains well, stays clean, less odour
Heavy, hard to remove, crop impaction risk (if eaten), poor insulation
Rivers, quarries
500–1000 per tonne (too heavy for small flocks)
Hay
NOT RECOMMENDED – holds moisture, grows mould, expensive
–
–
–
Kenya recommendation: Straw is the best all-rounder for most small and medium flocks. It is affordable, easy to handle, and chickens love it. If straw is scarce, rice hulls or chopped maize stalks are good alternatives.
Important: Always ensure bedding is dry and free of mould. Damp bedding is a disease risk. Store extra bedding under a roof.
5. Step-by-Step Coop Cleaning (Weekly Routine)
Follow these steps every week for a consistently clean coop.
Step 1: Move the chickens out
Let them free-range or place them in a temporary holding pen. This reduces dust exposure and keeps them out of your way.
Step 2: Remove all old bedding
Using a pitchfork or jembe, take out every bit of old litter from the floor and nesting boxes. Don't leave any corners – parasites love to hide.
Step 3: Scrape and sweep
Scrape dried manure off perches, nest box edges, and the floor.
Sweep out dust, cobwebs, and loose debris.
Pay attention to corners and crevices.
Step 4: Clean feeders and waterers (detailed in Section 6)
Do this while the coop is empty.
Step 5: Disinfect (monthly or as needed)
If you do a monthly deep clean, apply a safe disinfectant after scraping.
Options: dilute bleach (1:10), Virkon S, or agricultural lime.
If using chemicals, rinse thoroughly before adding fresh bedding. For lime, dust lightly over the floor before laying bedding.
Step 6: Add fresh bedding
Spread a 5–10 cm layer on the floor.
Place a generous handful in each nesting box.
Fluff the bedding so it's comfortable.
Step 7: Return feeders, waterers, and chickens
Place cleaned and dried equipment back. Let your birds enjoy their fresh home.
6. How to Clean Waterers and Feeders Thoroughly
Dirty waterers and feeders are major sources of disease. Follow this routine.
Waterers (daily and weekly)
Daily: Empty, rinse, and refill with fresh water. In hot weather, do this twice daily.
Weekly: Use a bottle brush and hot soapy water to scrub inside and out. Pay special attention to the rim and narrow necks. Rinse thoroughly – soap residue can make water taste bad.
Sun-dry: Place in direct sunlight for a few hours. UV light kills many bacteria.
Feeders (daily and weekly)
Daily: Fill only as much feed as the flock can eat in 20 minutes. Remove leftover feed – it attracts rodents and grows mould.
Weekly: Empty completely, wash with hot soapy water, scrub with a brush.
Dry completely before refilling. Damp feed grows aflatoxin, which is highly toxic.
Kenya tip: Elevate waterers and feeders on bricks or wooden stands. This keeps them cleaner and prevents spillage.
7. Cleaning the Chicken Run – Often Overlooked
The run is where chickens spend most of their day. A dirty run invites predators and disease.
Daily run inspection:
Remove spilled feed, food scraps, and broken eggs.
Check for signs of digging or holes under fences.
Remove wet spots or heavy faecal accumulation.
Weekly run maintenance:
Rake or sweep the run to break up caked manure.
If possible, move portable runs to fresh ground (rotational grazing).
Sprinkle agricultural lime or wood ash on heavily used areas.
Predator check: Daily inspection helps you spot predator damage early. Repair holes in wire mesh immediately.
8. The Deep Litter Method – Is It Safe for Kenyan Farms?
The deep litter method involves adding fresh bedding on top of old manure rather than removing it. Proponents say it saves labour and produces valuable compost. However, it comes with significant risks, especially in warm, humid climates.
Problems with deep litter in Kenya
Ammonia build-up: Manure breaks down and releases ammonia, which damages chicken lungs.
Dust particles: As manure dries, fine dust rises, irritating respiratory tracts.
Pathogen accumulation: Coccidia oocysts, bacteria, and fungi build up over time.
Parasites: Mites and lice thrive in undisturbed litter.
Mould growth: Our humidity favours mould, which causes aspergillosis.
When to avoid deep litter completely
Chicks under 12 weeks (very vulnerable to coccidiosis)
Hens over 5 years old (weakened immune systems)
Any flock with previous respiratory issues
Wet or rainy seasons
Poorly ventilated coops
Better alternative
Remove all bedding weekly. Put the old bedding into a compost pile. After 2–3 months, it will break down into excellent fertiliser for your vegetable garden. This gives you the best of both worlds: clean coop and free compost.
9. Signs Your Coop Needs Cleaning Immediately
Don't wait for your scheduled cleaning day if you notice any of these:
Strong ammonia smell – you should be able to breathe comfortably inside.
Wet or caked bedding – moisture = bacteria.
Flies, beetles, or mites – pests breed in dirty litter.
Chickens sneezing, coughing, or with watery eyes – respiratory irritation.
Dirty or faecal-stained eggs – soiled nest boxes.
Drop in egg production – stress from poor environment.
Feather pecking or cannibalism – overcrowding and dirty conditions cause stress.
Lethargic birds – illness is often linked to poor hygiene.
If you see any of these, clean the coop immediately and consider treating the flock.
10. Common Coop Cleaning Mistakes
Avoid these errors to keep your flock healthy.
Mistake
Consequence
Prevention
Not cleaning often enough
Ammonia and disease build-up
Stick to weekly schedule
Using wet or mouldy bedding
Respiratory infections, crop issues
Store bedding under cover; check before use
Forgetting nesting boxes
Dirty eggs, broodiness issues, parasite habitat
Clean nest boxes weekly
Not drying feeders/waterers
Mould and algae growth
Dry thoroughly before refilling
Ignoring the run
Pests and predators attracted
Daily run checks
Cleaning without a mask
Respiratory damage to you
Always wear a mask
Using hay
Mould, high cost, fire risk
Use straw instead
11. Biosecurity – Beyond Cleaning
Coop cleaning is one part of a broader biosecurity plan. Add these practices for maximum disease prevention.
Quarantine new birds for 14–21 days before introducing to your flock.
Limit visitors to your poultry area. Ask them to wear clean footwear.
Use footbaths (dilute bleach or Virkon) at the entrance of your coop.
Keep feed stored in rodent-proof containers.
Separate sick birds immediately in a hospital pen.
Vaccinate against Newcastle Disease and Gumboro on schedule.
12. Checklist for a Healthy Coop
Print this checklist and post it in your coop area.
Daily Checklist
Refill waterers with clean water (twice daily in hot weather)
Fill feeders with enough feed for 20 minutes consumption
Collect eggs twice daily
Remove any spilled feed or scraps from the run
Spot-clean wet bedding if needed
Check for signs of predators or illness
Weekly Checklist
Remove all bedding from floor and nest boxes
Sweep out dust and cobwebs
Scrape perches and floor
Wash waterers and feeders (hot soapy water, scrub, rinse, dry)
Add fresh, dry bedding (5–10 cm)
Rake the run and remove droppings
Inspect fences and mesh for damage
Monthly Checklist
Deep clean walls, perches, and nest boxes with disinfectant or lime
Check for external parasites – treat if needed
Inspect coop structure – repair holes or weak spots
Review flock health records and egg production trends
13. Disposing of Old Bedding – Turn Waste into Wealth
Used bedding is not rubbish – it's a resource.
Compost it: Mix old bedding with green waste (grass clippings, kitchen scraps). Turn the pile regularly. In 2–3 months, you'll have rich compost.
Apply to gardens: Use the compost to fertilise your vegetable garden. It adds nitrogen, phosphorus, and organic matter.
Sell it: In some areas, composted manure is sold to vegetable farmers.
Avoid runoff: Do not pile bedding where rain can wash it into streams or boreholes – this can contaminate water.
14. Conclusion
Keeping a clean chicken coop is not just about appearances – it's about protecting your investment and your family's health. A simple, consistent cleaning routine (daily spot checks, weekly full cleaning, and monthly deep sanitising) will prevent most common poultry diseases, boost egg production, and reduce veterinary costs.
In Kenya, where climate can be humid and diseases like Newcastle and coccidiosis are ever-present, good hygiene is even more critical. Choose the right bedding, clean thoroughly, and always wear a mask to protect your own lungs.
Your chickens will reward you with better health, higher production, and a longer productive life.
About Poultry Market Kenya
Poultry Market KE is your online resource for practical, local poultry information. We cover breed selection, feeding, disease prevention, housing, and farm management. Our articles are written specifically for Kenyan conditions – from the highlands to the coast, from small backyard flocks to medium-scale enterprises.
Poultry Market Kenya is a dedicated poultry farming and agribusiness blog focused on empowering farmers, traders, and agri-entrepreneurs across Kenya. We publish practical, data-driven content covering poultry production, disease management, feeding strategies, housing, equipment reviews, and market insights.
Our goal is to bridge the gap between traditional poultry farming practices and modern, profitable methods by providing reliable information, expert guidance, and real-world case studies.